With so much craziness surrounding us right now, I wanted to share these next two posts with everyone in hopes that it can give you some peace. We can all use a good calming ritual in our life, not just for times of excess stress, but as a daily practice. Whether we are preventing anxiety and stress or trying to relieve the overwhelming feelings we are currently having, these are habits we can always turn to. I’m a Virgo that tends to stress out and overthink everything, I can even manage to overthink my overthinking. Here are a few tried and true tools that I use to calm down. I hope you find them helpful!
Pranayama
Alternate Nostril Breathing or Nadi Shodhana can take some getting used to, but once you do it is a great calming breathing exercise. I always recommend blowing your nose before you get started because this one tends to get your sinuses activated.
- Come into an easy seated pose either in a chair or cross-legged on the floor.
- Relax the shoulders and sit up nice and tall with the crown of the head pressing up toward the ceiling.
Right-Handed People:
- Rest your left hand on top of the left thigh if you are sitting in a chair or on the left knee if you are sitting cross-legged, with the palm face up.
- Bring your right hand up and fold down the index and middle finger (Image 1).
- Rest your thumb on the right nostril and the ring and pinky fingers on the left nostril (Image 2).
- Gently close off the right nostril with your thumb (Image 3).
- Inhale through the left nostril.
- Gently block off the left nostril with the ring and pinky fingers (Image 4).
- Exhale through the right nostril.
- Inhale through the right nostril.
- Gently block off the right nostril with the thumb.
- Exhale through the left nostril.
- Inhale through the left nostril.
- Gently block off the left nostril with the ring and pinky fingers.
- Exhale through the right nostril.
- Inhale through the right nostril.
- Gently block off the right nostril with the thumb.
- Exhale through the left nostril.
- You may continue to breath like this for five more rounds, but you will end the breathing exercise on the exhale through the left nostril.
Left-Handed People:
- Rest your right hand on top of the right thigh if you are sitting in a chair or on the right knee if you are sitting cross-legged, with the palm face up.
- Bring your left hand up and fold down the index and middle finger.
- Rest your thumb on the left nostril and the ring and pinky fingers on the right nostril.
- Gently close off the right nostril with your ring and pinky fingers.
- Inhale through the left nostril.
- Gently block off the left nostril with the thumb.
- Exhale through the right nostril.
- Inhale through the right nostril.
- Gently block off the right nostril with the ring and pinky finger.
- Exhale through the left nostril.
- Inhale through the left nostril.
- Gently block off the left nostril with the thumb.
- Exhale through the right nostril.
- Inhale through the right nostril.
- Gently block off the right nostril with the ring and pinky fingers.
- Exhale through the left nostril.
- You may continue to breath like this for five more rounds, but you will end the breathing exercise on the exhale through the left nostril.
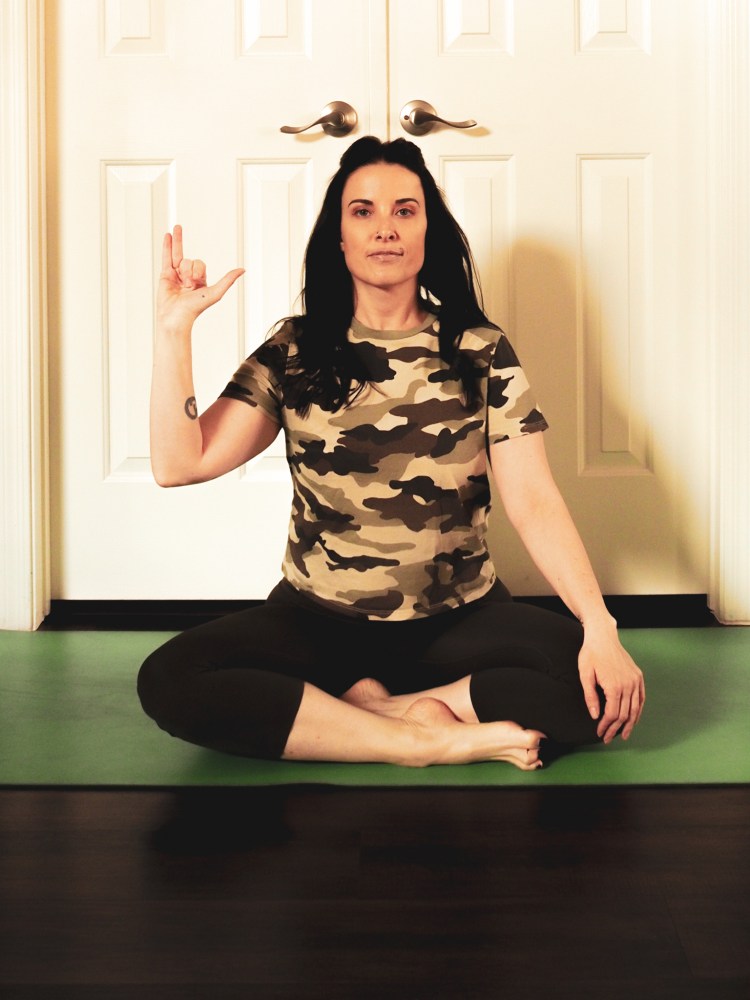
Image 1 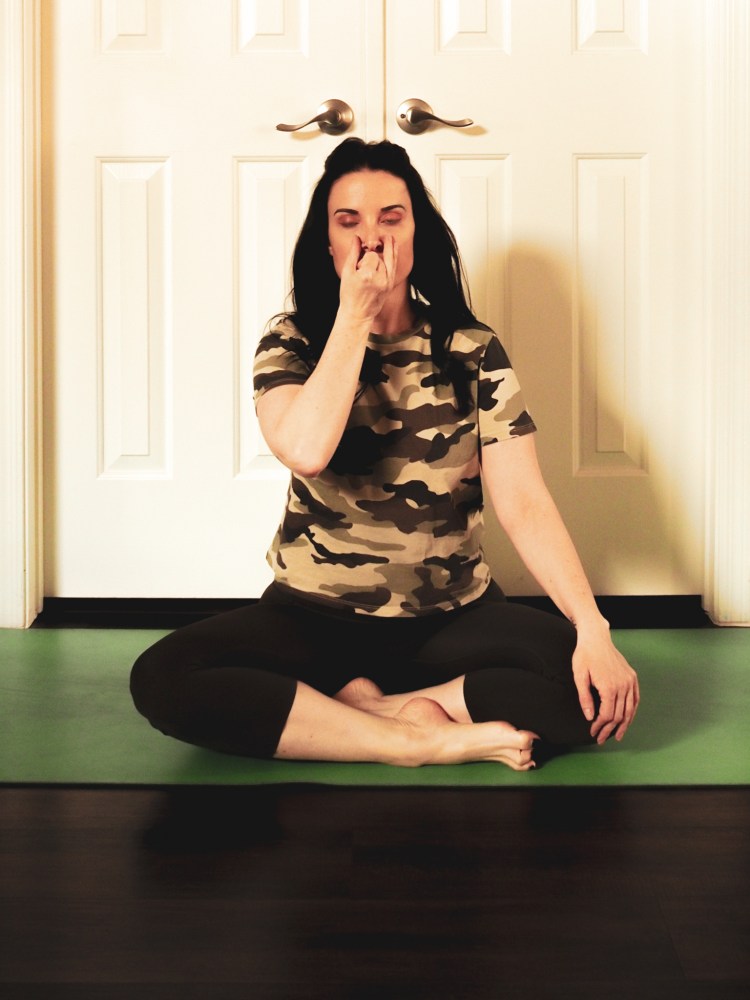
Image 2 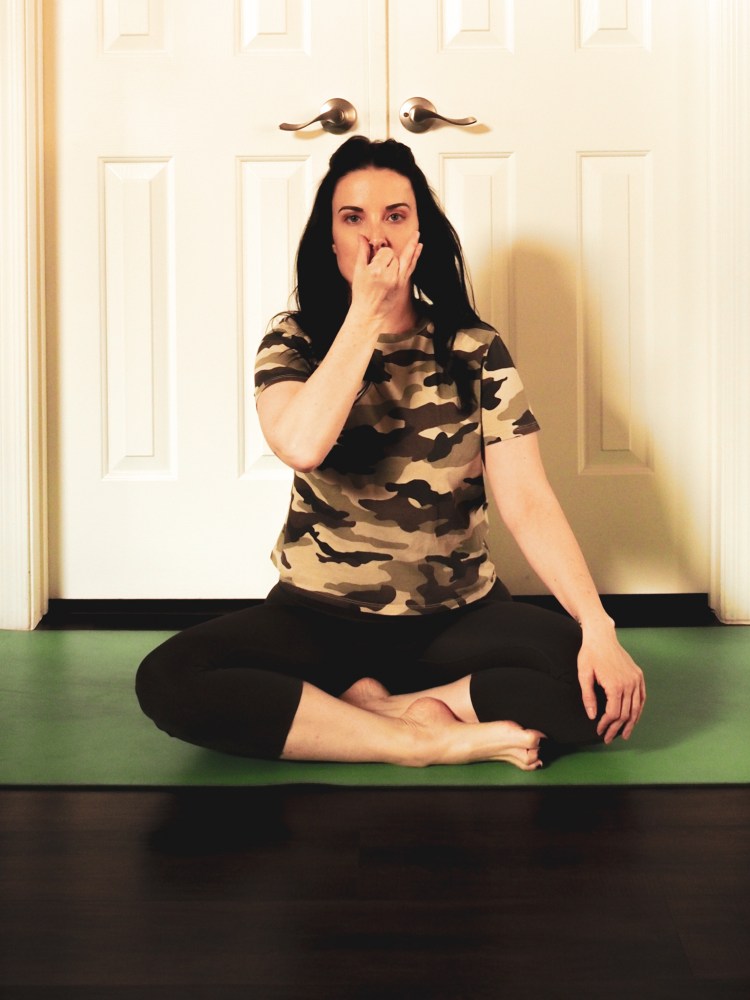
Image 3 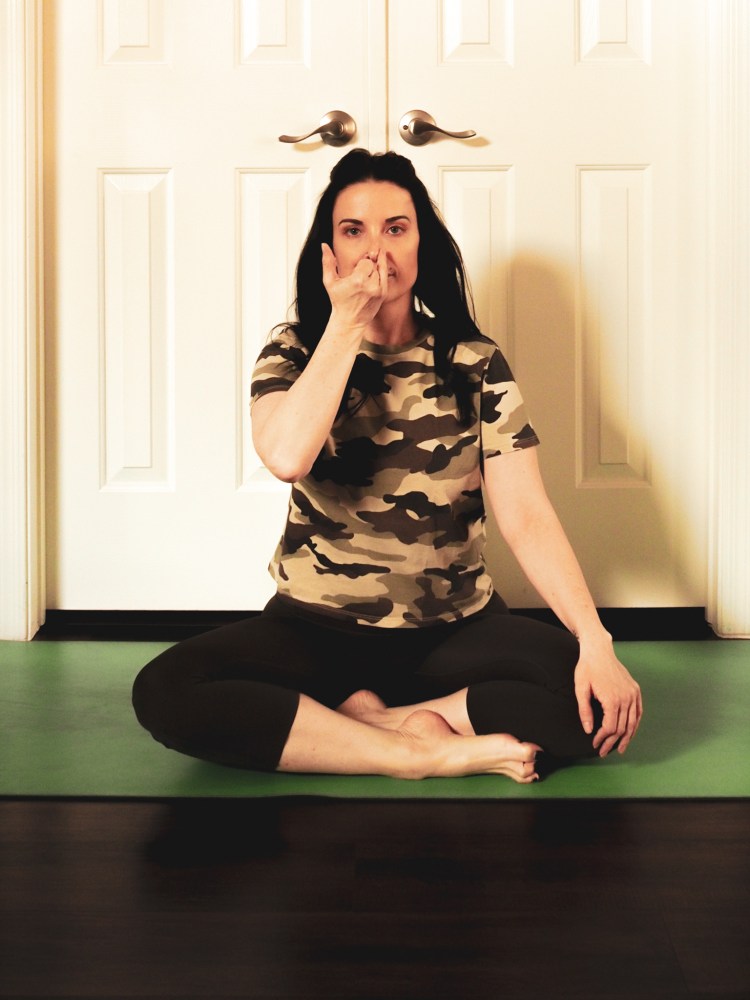
Image 4
For more information on the background and benefits of Nadi Shodhana, click here.
Yoga
Child’s Pose (Balasana) is great for calming as well as digestion. Closed-legged child’s pose keeps the spine convex or rounded over the legs, giving the back a nice lengthening and stretch. If you feel any back pain, come out of it slowly and either modify or abandon it altogether.
*Do not do this version if you are pregnant. Avoid child’s pose if you have any knee injuries.
- Start out kneeling on the mat and sitting back on the heels (Image 5).
- Bring the hands down onto the mat in front of you (Image 6).
- Start to walk the hands forward, folding over the thighs and bringing the forehead down onto the mat (Image 7).
- If your forehead does not touch the mat, place a block, rolled blanket or stack both fists and rest the forehead here.
- If you have any pain or tightness in the knees or your seat doesn’t reach your heels, roll a blanket and place it behind the knees.
- Extend the arms out in front of you or rest them along the sides of the body.
- Take five to ten deep relaxing breaths here.
- Slowly walk the hands back toward you and press yourself back up into Hero Pose.
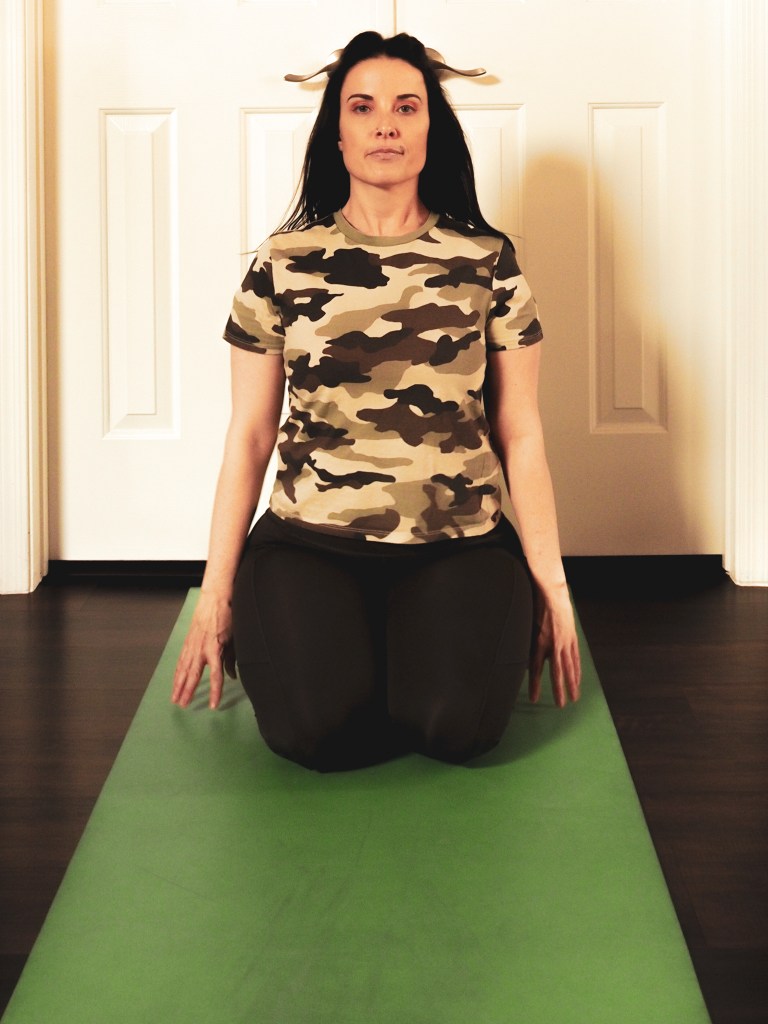
Image 5 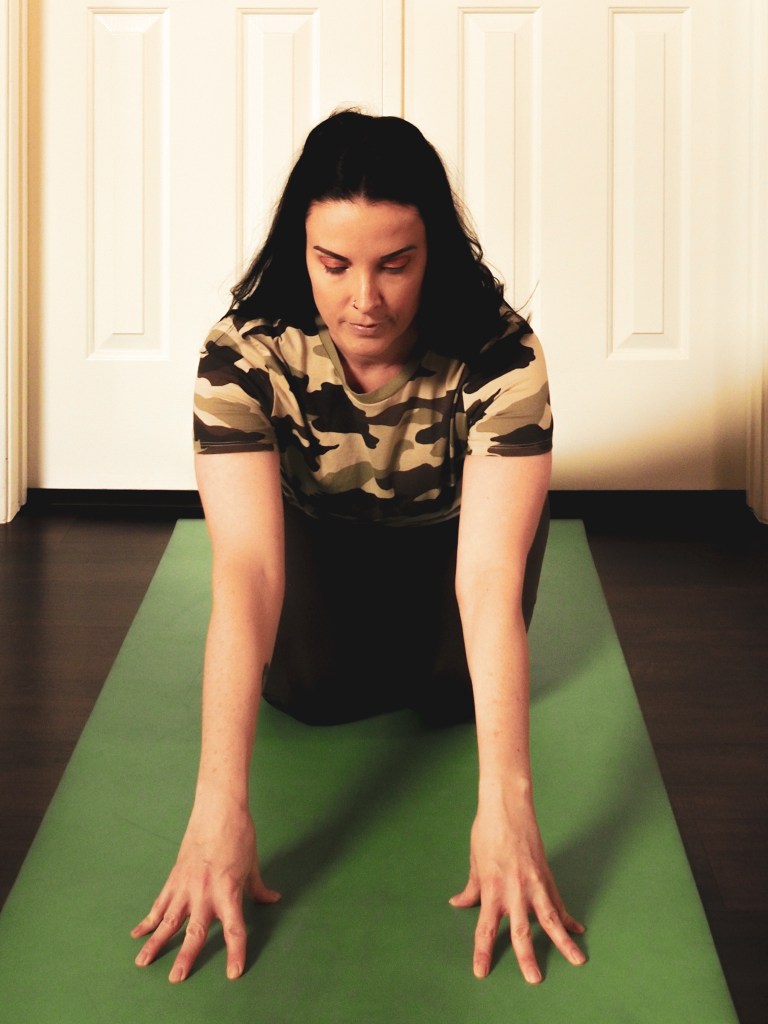
Image 6 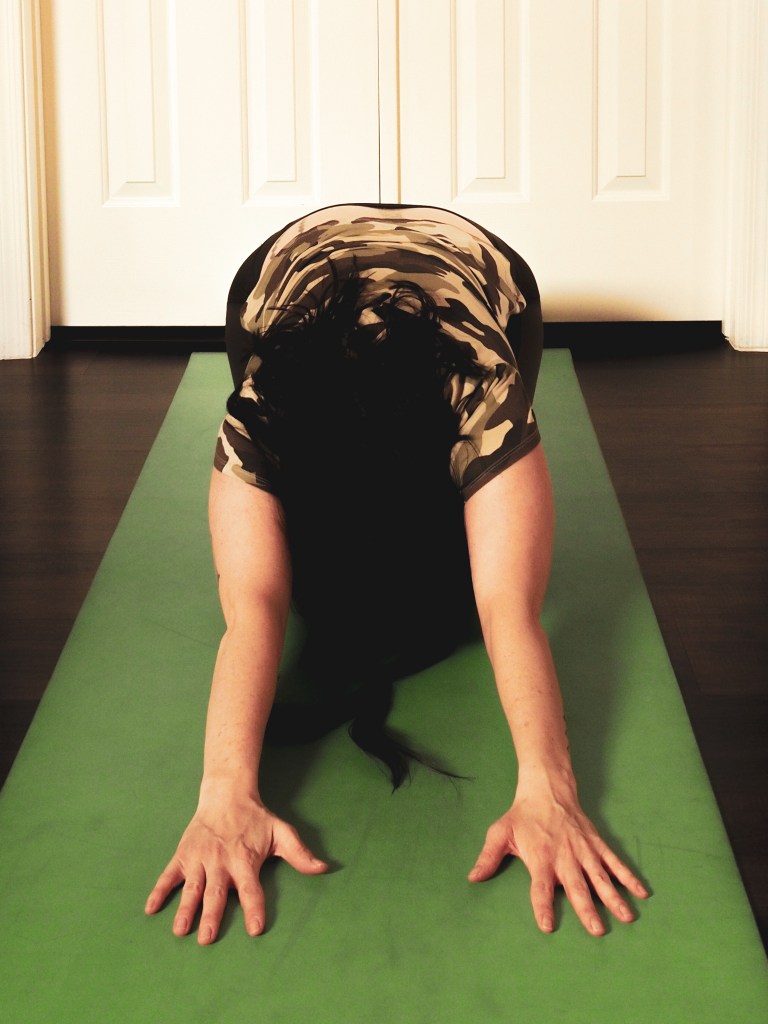
Image 7
Wide-Knee Child’s Pose is a variation of Childs Pose that gives the spine a concave stretch, arching slightly. Here you will feel the stretch in the hips and shoulders. Again, if you feel any back pain, come out of it slowly and either modify or abort mission.
- Start out in Hero Pose (Virasana) kneeling on the mat and take the knees to the outsides of the mat, toes stay together.
- Sit back on the heels (Image 8).
- Bring the hands down onto the mat in front of you (Image 9).
- Start to walk the hands forward, bringing the chest and forehead down onto the mat (Image 10).
- Extend the arms out in front of you, keeping the arms engaged and elbows lifted off the mat.
- Take five to ten deep relaxing breaths here.
- Slowly walk the hands back toward you and press yourself up.
- Draw the knees together and sit back on the heels.
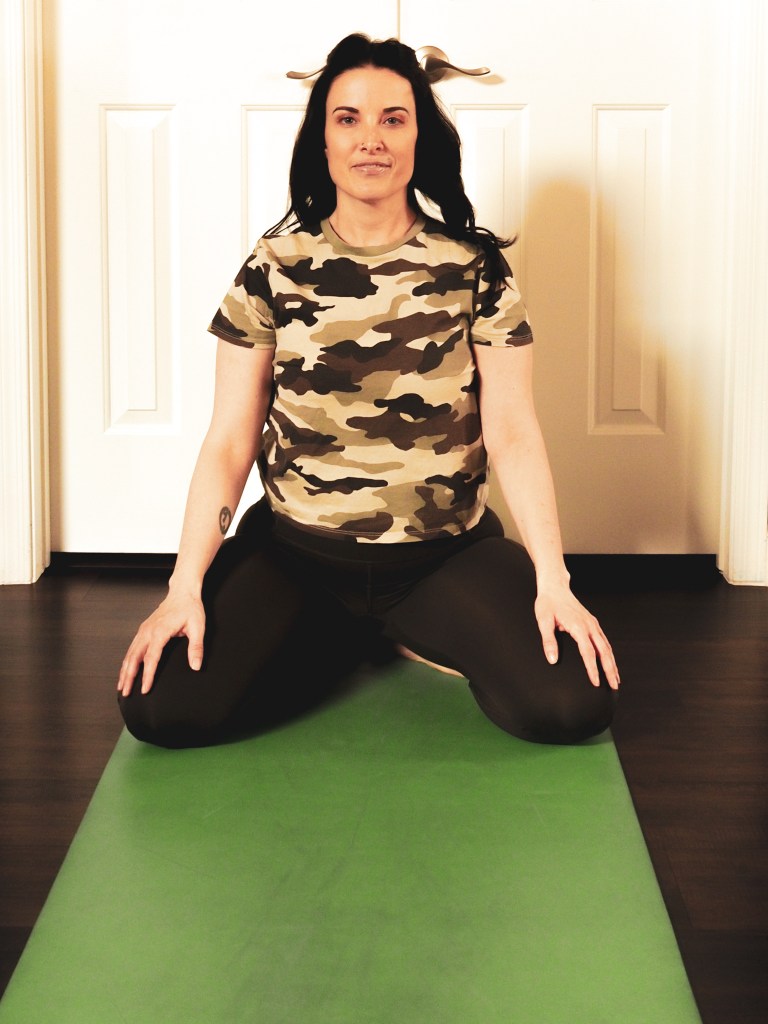
Image 8 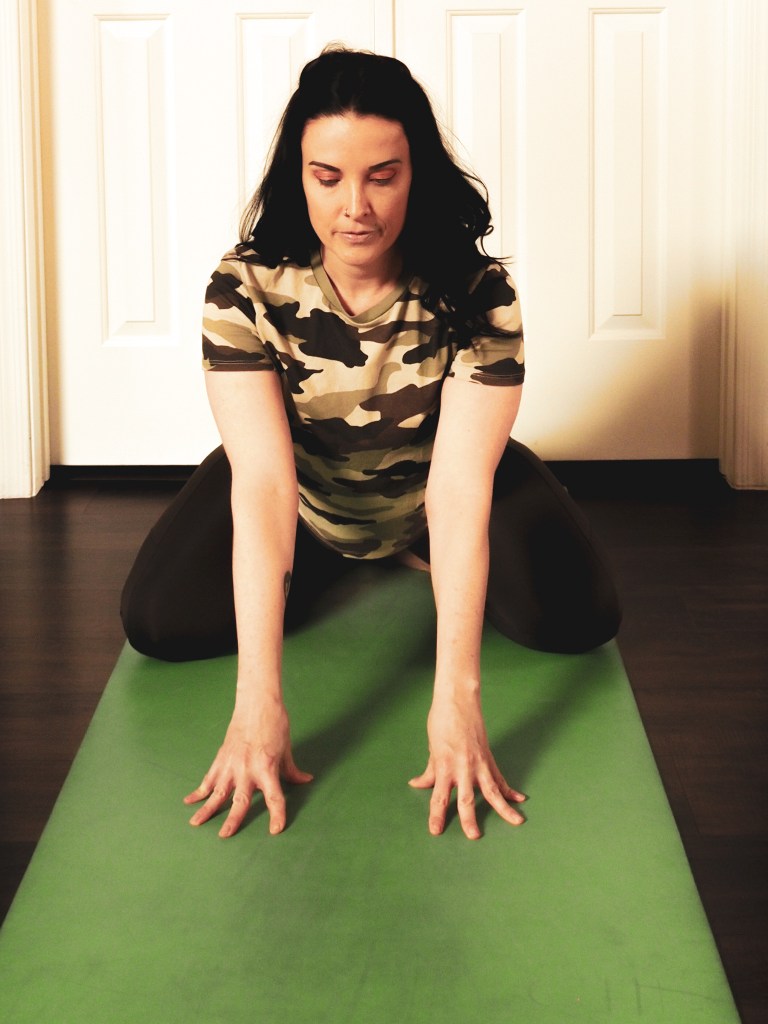
Image 9 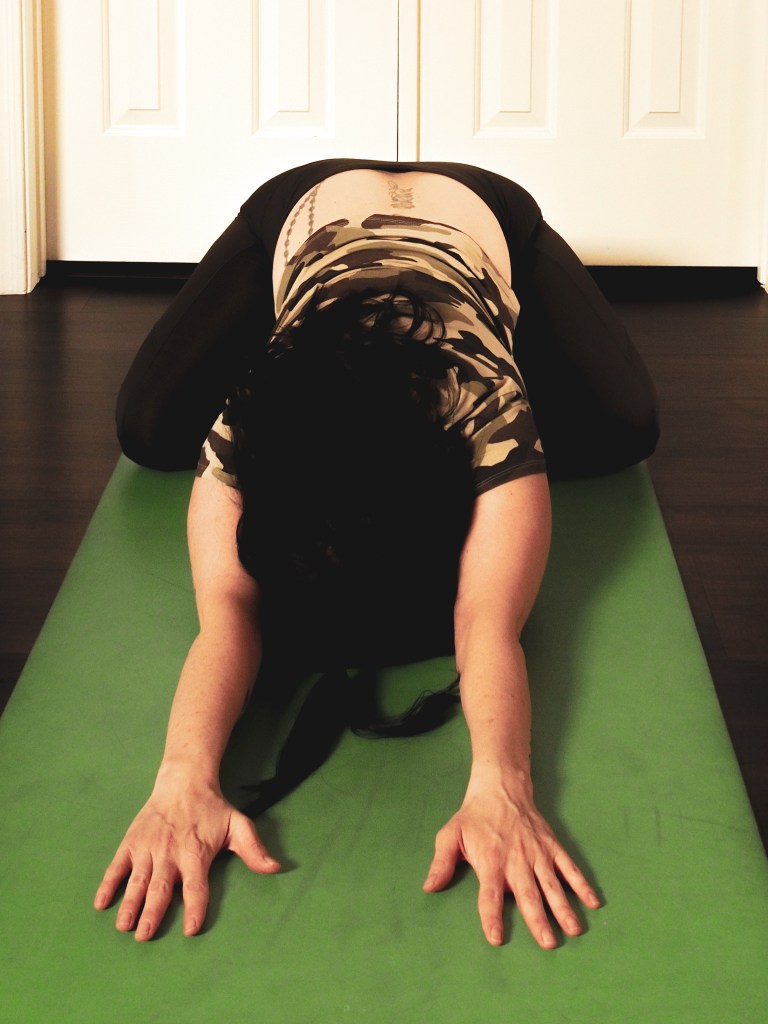
Image 10
Both variations of Child’s Pose are great to take during yoga classes when you feel like your body needs a break or you need to regroup before getting back into the asana.
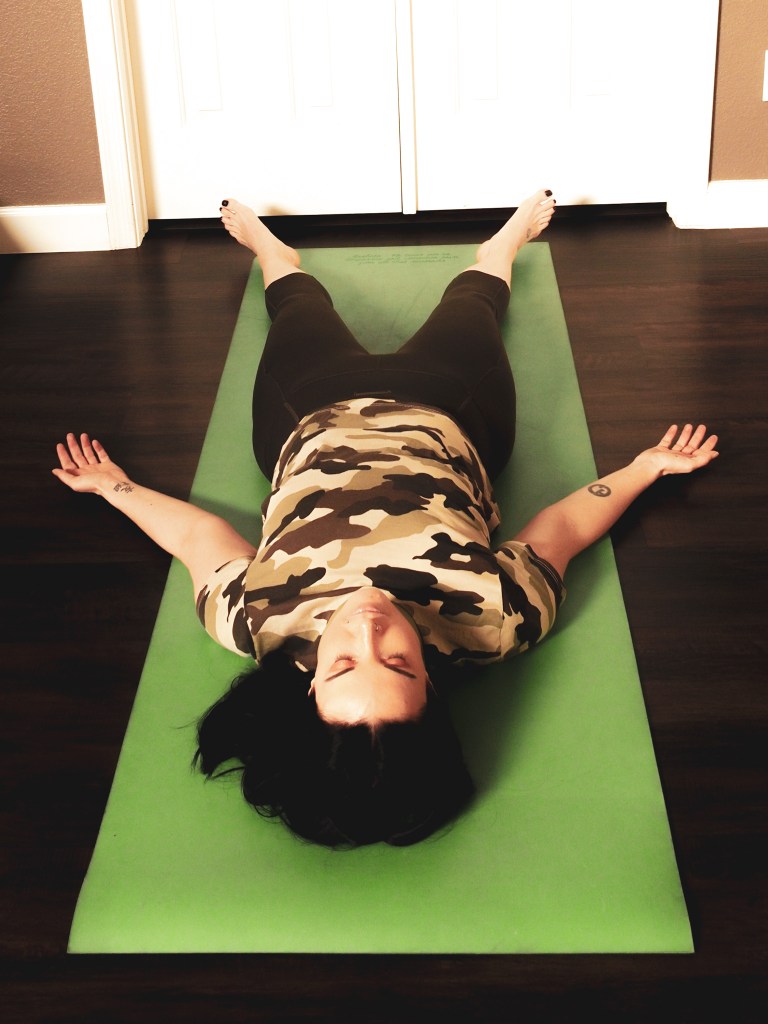
Legs-Up-The-Wall (Viparita Karani) – This pose is great if you’re having trouble sleeping. Doing this for 5 to 10 minutes before can help with insomnia. The benefits of Legs-Up-The-Wall seem unending, but a few of my favorites include alleviating migraines and headaches, lessens anxiety, aids with digestion, alleviates mild depression, calms the mind, refreshes the blood to legs and reproductive organs, helps with menstrual cramps and relieves lower back pain. Who doesn’t love one good pose that can do so many different things?
- Come to the wall.
- Sit down with your left side pressed up against the wall and the knees bent, souls of the feet on the ground (Image 11).
- Use your right hand to guide yourself down onto your right side lying in the fetal position (Images 12 and 13).
- Scoot your bottom until it touches the wall.
- Roll onto your back and gently swing your legs up so that the backs of your legs are pressed against the wall.
- Place the hands along side of you, on the heart or on the belly (Image 14).
- You can close your eyes and just relax here.
- When you are ready to come out of the pose, draw the knees in toward the chest (Image 15).
- Roll back onto your right side, coming into the fetal position (Image 16).
- Use your left hand to press yourself up.
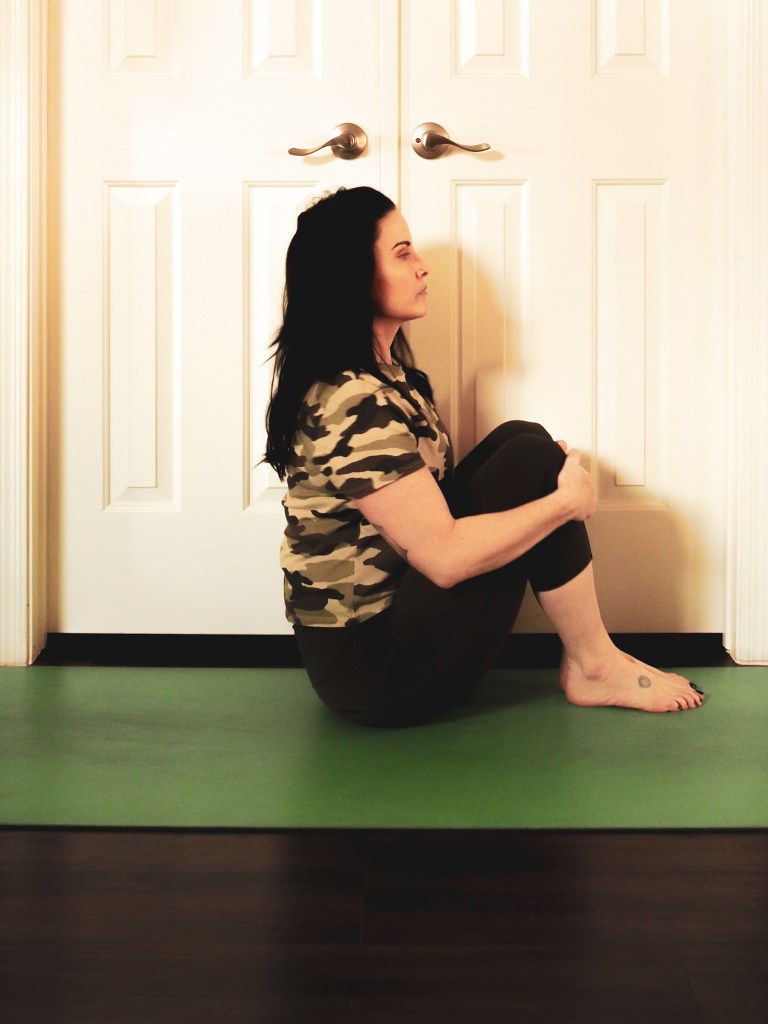
Image 11 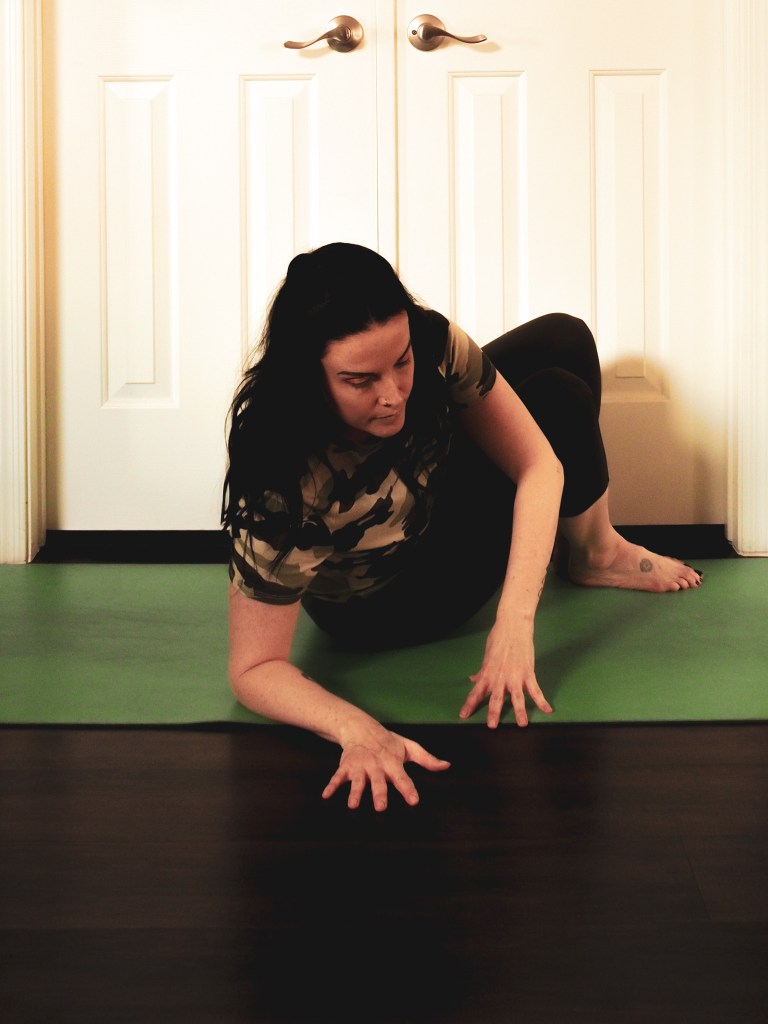
Image 12 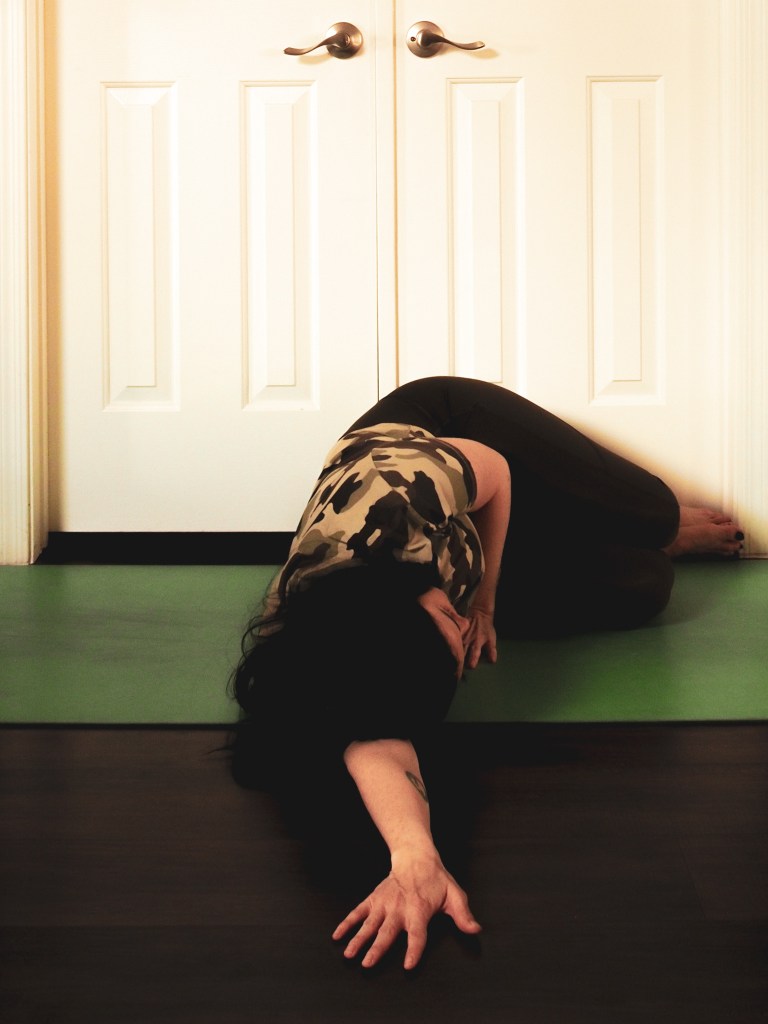
Image 13 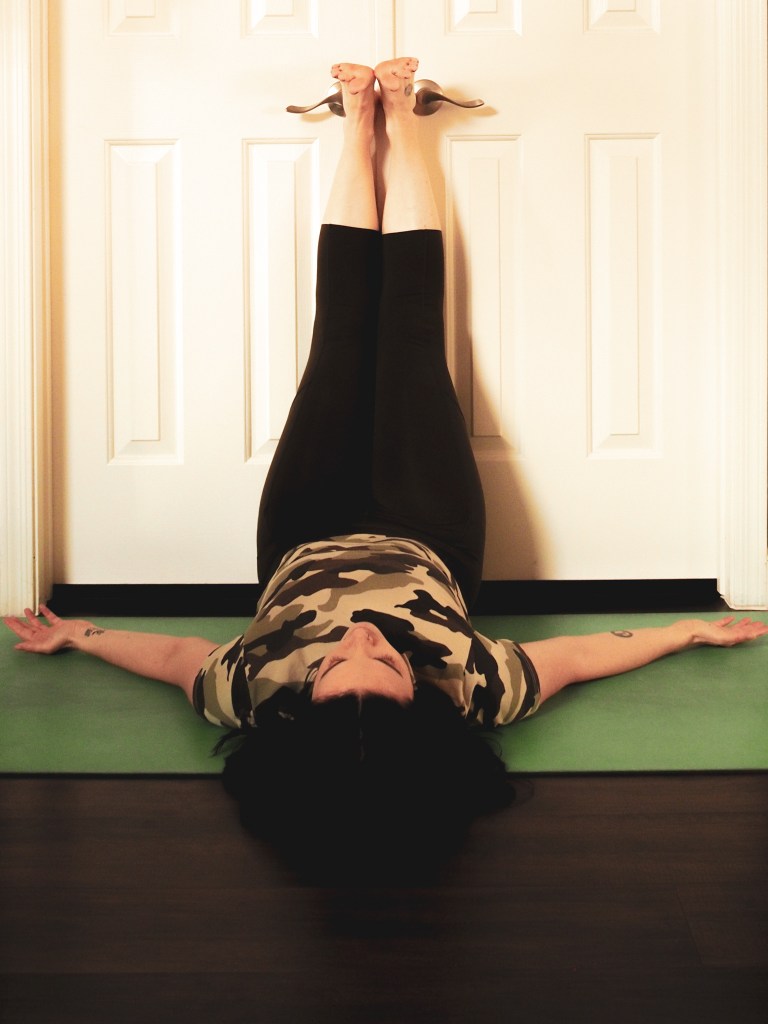
Image 14 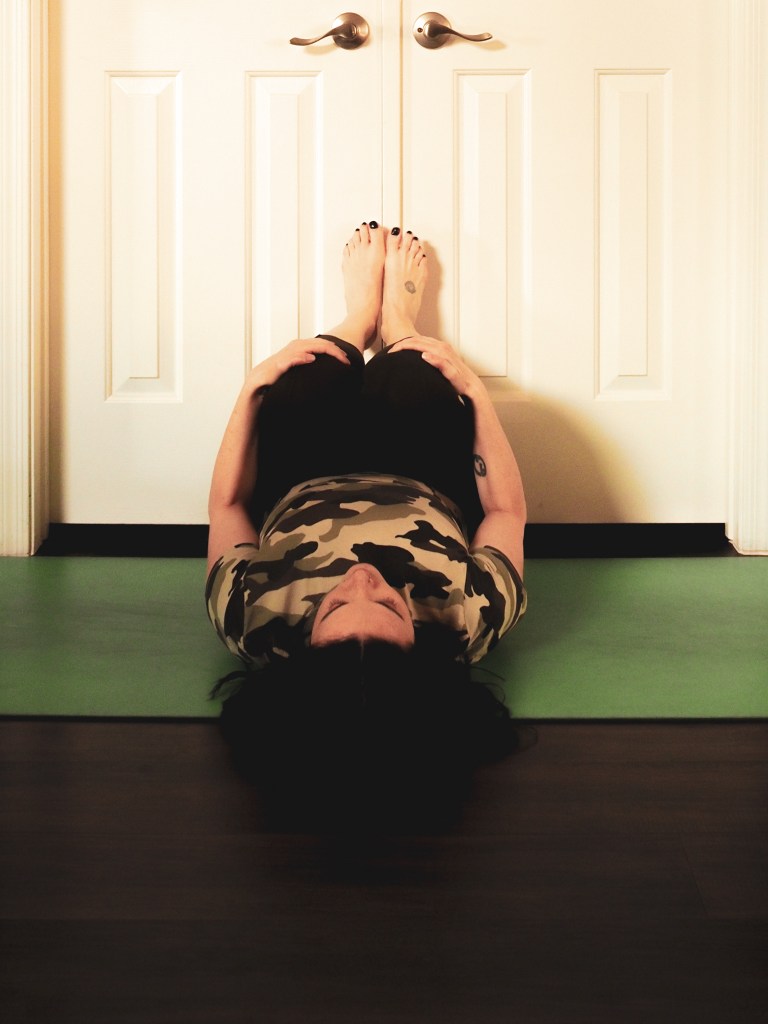
Image 15 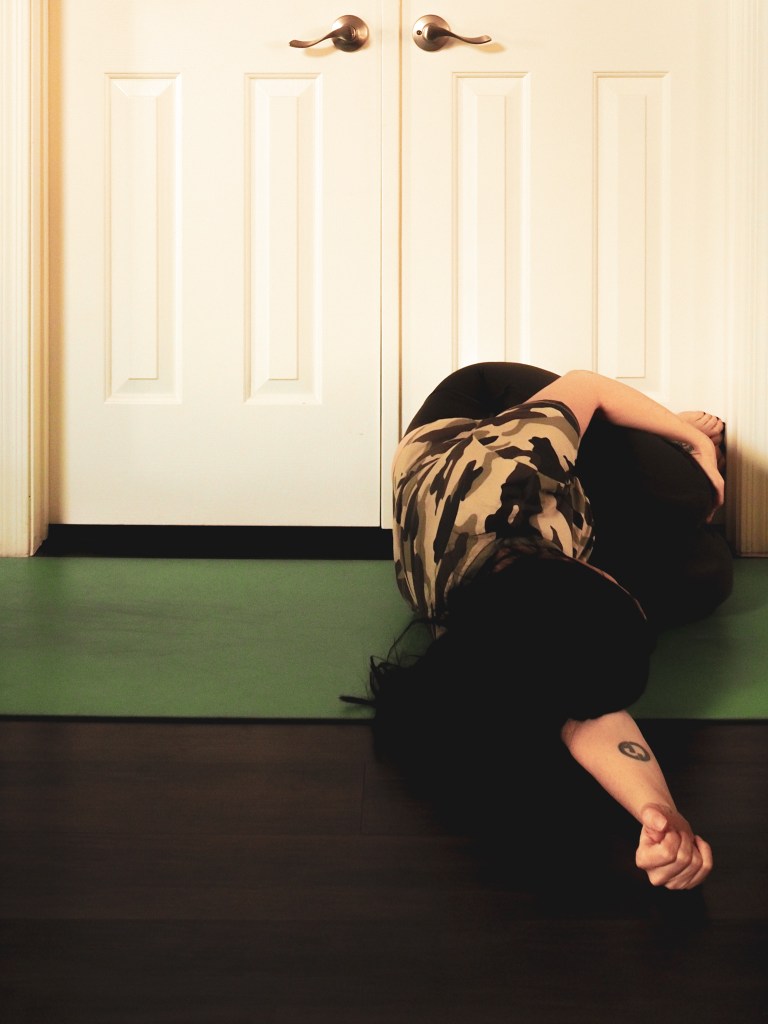
Image 16
Corpse Pose (Savasana) or your final resting post after a yoga class. I’m sure you’ve seen the shirts that say, “I’m Just Here for the Savasana”. During a long, difficult yoga class, savasana is that light at the end of the tunnel. Students wait in anticipation for the teachers to cue them down onto the mat and onto their backs. This pose may be the most relaxing pose in yoga.
- Lay back on your mat, belly facing up toward the ceiling.
- Draw the shoulder blades down the back.
- Arms are along the sides with the palms facing up.
- Step the feet out to the edges of the mat and let the feet fall open like the pages of a book.
- Close the eyes.
- Let the mind be still and focus on the breath. Stay here as long as you would like.
To come out of your savasana:
- Stretch the arms overhead, stretching out the entire body from fingers down to the tips of your toes.
- Draw the knees in toward the chest.
- Gently, roll onto your right hand side coming into a fetal position, using your left arm as a pillow (Image 13).**
- Stay here for a couple breaths.
- When you are ready, press into your right hand and press yourself up to seated.
**If you are pregnant you will roll onto your left hand side instead to prevent the lying on the vena cava.
Self-Care
- Essential Oils – You can diffuse the oils into the air, smell them from the bottle, or use them topically. If you use them topically, make sure they are safe to apply to the skin and you use a carrier oil to dilute them as recommended. I use Doterra because they are therapeutic grade. I know that Young Living is as well. Some great places to apply essential oils are the insides of your wrists, your heart area, but my absolute favorite is the bottoms of the feet. It may sound strange, but our largest pores are on the bottoms of our feet which means the oils are able to absorb quickly. Not to mention, our feet are a road map to the rest of our body. If you’ve ever seen a reflexology photo of the feet, you know that every area of your body can be reached through your feet. Pretty amazing, huh? Here are my favorite essential oils for relaxation.
- Lavender
- Serenity (Doterra Blend)
- Vetiver
- Bergamot
- Chamomile
- Melissa
- Rose
- Melissa
- Clary Sage
Playlist
Here is an hour long playlist with some of my favorite calming songs to relax me and put me in a good mood!